live2D study

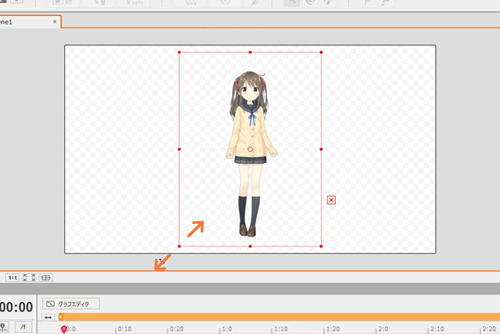
Live2D is a technique of generating animated 2D graphics, usually anime-style characters, using layered, continuous parts based on a single illustration, without the need of animating frame-by-frame or creating a 3D model. Live2D is also the name of an eponymous animation software series employing the technique and the software’ developer company, created by Japanese programmer Tetsuya Nakajo.
I found this software and technique quite useful because it enable me to
make anomation from 2D illustration, also this software has been used in many games today, so I think it is useful to study this programe.
live 2D and facerig combination
1. Dowload page for the Live2D Cubism Editor.
http://www.live2d.com/en/products/cubism_editor
2. Official tutorials for building a Live2D model in the Cubism Editor.
http://www.live2d.com/en/support
3. Unofficial Tutorial series for the Cubism Editor on YouTube by imst
YouTube™ Video: Live2D Cubism 2.0 tutorial (2015) – Ep.00 “Introduction”
Views: 22,232
The upcoming series of tutorial is for both new and old viewers. I will first spend 1 episode for just new starters, and then many episodes to demonstrate step by step from preping material to…
4. Guide for preparing the data for importing in FaceRig :
English, version 1.0
https://drive.google.com/file/d/0B9A2HzJCWwFWZzJadVVhVmFTekU/view?usp=sharing
JPN, version 1.0
https://drive.google.com/file/d/0B-99Ww6ro_aodkhET1lwWFVFQTQ/view?usp=sharing
Note: the latest English version of the document above comes with the program, if you purchase the Live2D Module. The version that comes with the program is always up-to-date, the version in this forum link may become outdated.
5. Please keep in mind that the Live2D Cubism SDK used in FaceRig is the 2.1 version
6. Legal notices for using the Live2d Sample avatars: http://sites.cybernoids.jp/cubism_e/samples
7. Live2D Technology website (English) :
http://www.live2d.com/en/
8. Source data for our Gogu the Rabbit Workshop avatar
https://drive.google.com/file/d/0B-99Ww6ro_aoUEJieDBxNUtCZFk/view?usp=sharing
Note specifically for workshop items : Creators, please try and use unique names for the your Live2D avatars, otherwise, if they are too generic, they can overwrite each other when they are copied to the FaceRig Data Folder :). You can set the friendly name string to pretty much whatever you like, and that will be what appears in the Avatar browser within FaceRig, but consider that the avatar actual file name from the disk should be unique to your avatar to avoid name collision for avatars downloaded from the Steam Workshop.